Showing posts with label homeschool- teaching art. Show all posts

Wednesday, March 20, 2013

Volcano-making

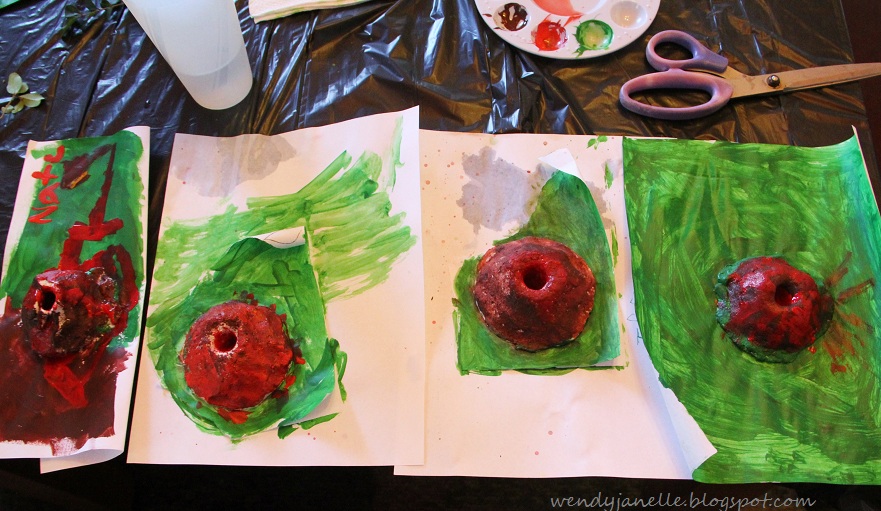
Remember those volcanoes we sculpted, using our salt dough recipe?
A week later, they were dry and ready to paint!
We used acrylics to paint the inside red, the outside brown, and add grass around the base.

 I gave them creative license with their eruptions. Some of them had an all-out explosion on their hands, and others had rather inactive volcanoes.

Love how their personalities come out in their art.

 Progress, on some of their work:
We'll add more dimension to our dioramas next time, with pebbles and twigs, etc.


Tuesday, March 19, 2013

Girls' Art Class

For the last two weeks, we've been working on Folk Art drawings,
with lots of bold patterns and bright colors....
 {{amazing results!}}
 ...and bead-making, with this salt dough recipe.
 We also make necklace pendants and itty bitty houses.
I can't tell you how delighted I was to see my little pupils painting their homes with stripes and polka dots! That's what I love about kids!!-- their imagination is the limit!
Round house? Why not! Polka dots and swirly doors? Sure!
 It was sooooo gorgeous last week, so we did our lessons and snack break outside on the porch,
along with a little stretching (goofing off, whatev')
The sky is the limit!
Make some dough, mold your scuptures, and let air-dry.
(We left ours under the couch for a week, and painted them during the following lesson.)
Use tempera or acylics to paint them.
These are great, cheap, easy, personal Mother's and Father's Day gifts!

Thursday, March 7, 2013

Boys' Art Class

In my Boys' Art Class, on Tuesday, we worked on Modigliani Self-Portraits in Chalk pastel!
First, with our black paper in hand, we created creases to help with the proportions that Modigliani is so well-known for.

 The boys were great about following directions, and listening to the very brief description of Modigliani's art.
 After sketching out their self-portraits, they colored them in entirely, and started adding the details.
We talked about blending pastels, and how to use fingers to smooth the color around.

Modigliani also typically left his portraits with a "blank" stare (think- no eyeballs), but only two of my students wanted to leave their self-portraits like that, which is okay. It IS a bit creepy looking.

Next, they outlined their entire portrait in black pastel.

I love that this sweet little dude even copied the pattern on his shirt!

In our remaining time, we molded volcanoes out of the air-dry modeling clay I had mixed up before class.


By our next class, they will be dry and ready to paint!

Enjoy art every day, folks!
It's all around you, in everything you see!

Wednesday, March 6, 2013

Jello Playdough in Art

The best thing about jello playdough? It smells aaaamazing!
Your whole house will smell marvelously yummy while you cook this.
I hadn't intended to make more playdough so soon, but our art lesson with professional artist John Lasater required play dough in primary colors. And, wouldn't you know it, Wal-Mart had only blue and yellow. Being in this little town, with no Target or other means to search for red playdough, we decided to make our own! 
Below, my amazing Jello Playdough Chef.
He poured, he mixed, and he was the first to try out the goods. 

~Jello Playdough~
 •1 cup of flour
•2 Tbs salt
•2 Tbs cream of tarter
•1 cup water
•2 Tbs oil - (I used canola oil, but I'm sure any edible oil would work!)
•1 3oz. pack of Jello in the color of your choice (the off-brand will work fine)
I doubled this recipe, for our group.
First, mix all your ingredients in a pan or pot.
Mix in your jello and watch it turn a bright color! This is the strawberry flavor.
After it's mixed, turn the heat to medium-high and stir constantly. Works those arm muscles!
It will start smelling great. It will also start slowly thickening and clumping together, after about 2 minutes. It's done in about 6-7 minutes. Just make sure there aren't wet areas, and it's in a ball.
Let cool. If it seems a bit sticky, add a touch more flour. It should be smooth and pliable.
Store in an airtight container or plastic bag, and it should last quite a long time.

It was a hit with the little artists!
A huge thanks to our guest speaker, John, for the lesson he shared about values, hues, and color mixing!
Our homeschool group has so many wonderful opportunities and so much support!!!

I love watching kids take such joy in art!
When I grow up (ha) I'm going to be an elementary art teacher!! --
....wait, I already get to do that!
I live such a great life! :D


Friday, February 8, 2013

Art Class~ Birch Trees

First, I had my little pupils paint "grass" along the bottom of their sketchbooks. We talked about using strokes to paint, rather than jamming the brushes down on the paper. Acrylics dry fast, so we mixed in some water, painted our grass and blew it dry.


 Next, we used watercolors to add sunsets to our backgrounds.

While our sunsets dried, we used another sheet of paper to start on the birch trees. 
That there, folks, is my expired wageworks healthcare card.
See? It's still good for somethin'.

The kids took a short break while we waited for everything to thoroughly dry.
Next, we cut out our birch trees and pasted them on our backgrounds.

 Look at their beautiful results!!
I'm so proud of my talented little students!
 Some of their birch trees didn't reach entirely across, and kids wanted to add leaves to the top.
So we fingerpainted!
(Simply because fingerpaint is fun and an easy way to add foliage!)


Wednesday, November 14, 2012

Book Art

I Miss You, Stinky Face is one of my Littlest's favorite books.
For afternoon art recently, we did projects that went along with beloved storybooks.
For Little Man's book, we made paper plate alien space-crafts, below.

What could be simpler? Paper plates + markers + bendy straws = spaceships!

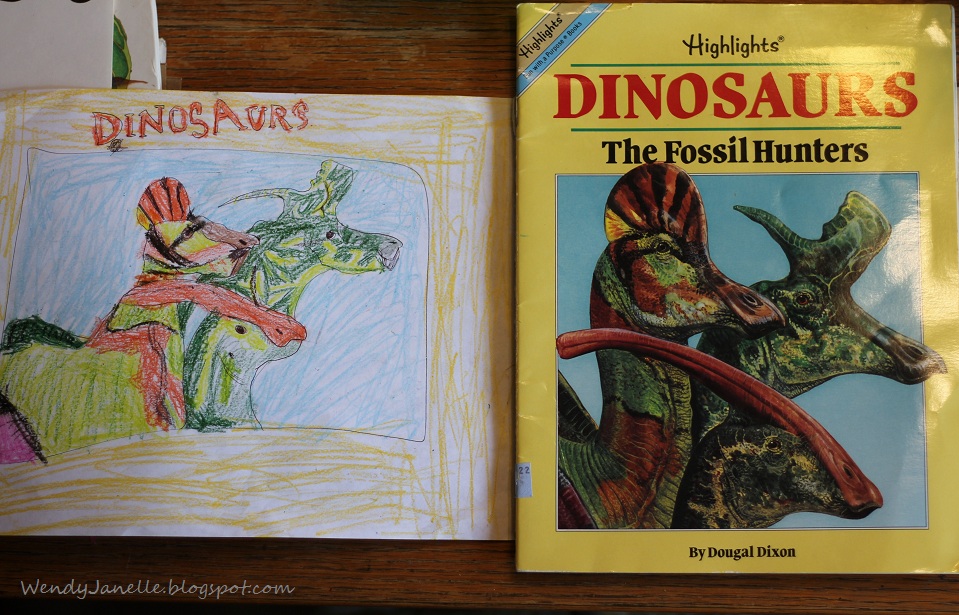
My Oldest Boy choose a Dino Fossil Hunter book, and illustrated the cover.
Love it!!

My Middlest Dude picked Don't Let the Pigeon Stay Up Late.
Of course.
He loves those books, possibly because they start to annoy me!
He did a very fine job of reproducing the cover, in ink. :D
I'm so thankful to share two of my greatest joys-- books and art--with my kids!

Saturday, October 13, 2012

Frida Kahlo

 
"Painting completed my life."Frida Kahlo
 

We've been reading about and studying famous artists in the afternoons. 
Last week included Frida Kahlo.
Frida and Diego, 1932
 
Frida was a Mexican painter, best known for her numerous self-portraits.
"I paint self-portraits because I am so often alone,
because I am the person I know best."-Frida 
 
On the first day, we read the summary of her life (not in all the detail, as she led a very troubled, very painful life), and then painted pictures of Frida.
What strikes me about this woman is that, despite her physical injuries, the war that raged around her, and a volatile marriage, she clung to art. After an accident that left her in a full body cast for months, she began to paint. "Her mother had a special easel made for her so she could paint in bed, and her father lent her his box of oil paints and some brushes."
Here, my thoughts were drifting to children in shelters, hospital beds, foster homes...children who could also cling to art, if they were given the supplies and encouragement (what can we do about this? Let's make it happen. I'm brainstorming...)
 
Our finished products:

Next, we did our own self-portraits, in the bright and vibrant colors, frontal-view that Frida used.
Those coming up soon! :)


Tuesday, June 19, 2012

Drawing a hot air balloon

Start with simple watercolor shapes:

 When dry, add ink.
Crisscross lines over the top half of the circle, to form the net on the balloon.

When you add just a line at a time, it becomes simple...
just shapes....just lines... just art...